Tag Archives: tplink

Converting Asus WL-500g Deluxe and TP-Link TL-WR1043ND to OpenFlow switches (Part 3)

Uploading and setting up the firmware on TP-Link TL-WR1043ND router

  1. Connect your PC’s Ethernet adapter to TP-Link TL-WR1043ND router’s LAN port
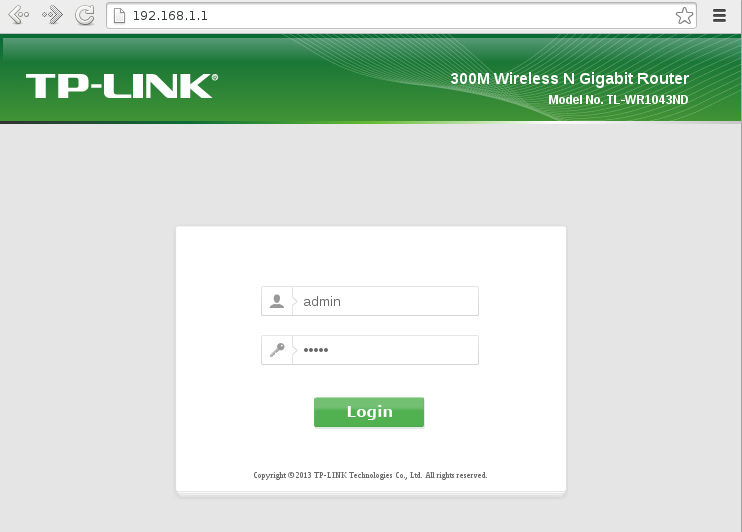
    Note: The adapter configuration must remain the same as in Asus WL-500g Deluxe setup.
  2. Open http://192.168.1.1 in your browser
    Type your username and password!
    (default admin/admin)
    Click System Tools
    Click Firmware Upgrade
    Click Browse…
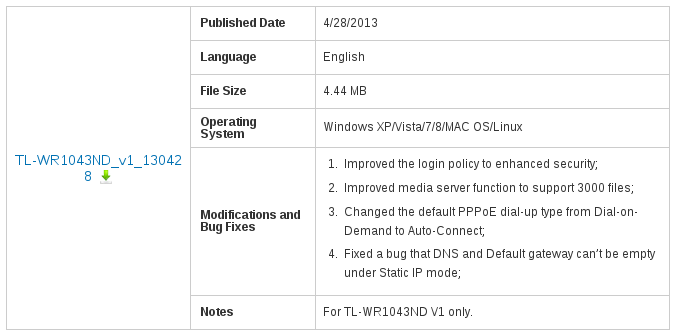
    Select “openwrt-ar71xx-tl-wr1043nd-v1-squashfs-factory.bin” file and click Open
    Click Upgrade
    Click OK for question about the upgrade
  3. Wait until the progress bar finish
  4. From a terminal login to the router:
    $ telnet 192.168.1.1
    You should get:
    Connected to 192.168.1.1.
    Escape character is '^]'.
    === IMPORTANT ============================
    Use 'passwd' to set your login password
    this will disable telnet and enable SSH
    ------------------------------------------
    BusyBox v1.15.3 (2013-11-16 00:12:17 CET) built-in shell (ash)
    Enter 'help' for a list of built-in commands.
     _______                     ________        __
    |       |.-----.-----.-----.|  |  |  |.----.|  |_
    |   -   ||  _  |  -__|     ||  |  |  ||   _||   _|
    |_______||   __|_____|__|__||________||__|  |____|
    |__| W I R E L E S S   F R E E D O M
    ---------------------------------------------------
    Backfire (10.03.x Snapshot, r33081)
    ---------------------------------------------------
    * 1/3 shot Kahlua    In a shot glass, layer Kahlua
    * 1/3 shot Bailey's  on the bottom, then Bailey's,
    * 1/3 shot Vodka     then Vodka.
    ---------------------------------------------------
    root@OpenWrt:/#
  5. Change the routers IP address (just for running config):
    root@OpenWrt:/# ifconfig br-lan 192.168.1.2

    Close telnet (Ctrl + C, or by closing the terminal)

  6. Login to your router
    $ telnet 192.168.1.2
  7. Change your password:
    root@OpenWrt:/# passwd

    Enter your new password 2 times.

  8. Reconnect to the router using SSH
    root@OpenWrt:/# exit
    $ ssh root@192.168.1.2

    Type “yes” for the question about the RSA key and press Enter
    Give your password and press Enter

  9. Change switch identifier in openflow configuration:
    root@OpenWrt:/# nano /etc/config/openflow
    Change line

    option 'dpid' '000000000001'

    to

    option 'dpid' '000000000002'

    Press Ctrl+O, Enter than Ctrl+X to exit

  10. Change the network configuration
    • You can this by hand:
      root@OpenWrt:/# nano /etc/config/network
      Correct configuration:

      config 'switch'
      	option 'name' 'rtl8366rb'
      	option 'reset' '1'
      	option 'enable_vlan' '1'
      	option 'enable_learning' '0'
      config 'switch_vlan'
      	option 'device' 'rtl8366rb'
      	option 'vlan' '1'
      	option 'ports' '1 5t'
      config 'switch_vlan'
      	option 'device' 'rtl8366rb'
      	option 'vlan' '2'
      	option 'ports' '2 5t'
      config 'switch_vlan'
      	option 'device' 'rtl8366rb'
      	option 'vlan' '3'
      	option 'ports' '3 5t'
      config 'switch_vlan'
      	option 'device' 'rtl8366rb'
      	option 'vlan' '4'
      	option 'ports' '4 5t'
      config 'switch_vlan'
      	option 'device' 'rtl8366rb'
      	option 'vlan' '5'
      	option 'ports' '0 5t'
      config 'interface' 'loopback'
      	option 'ifname' 'lo'
      	option 'proto'  'static'
      	option 'ipaddr' '127.0.0.1'
      	option 'netmask' '255.0.0.0'
      config 'interface'
      	option 'ifname' 'eth0.1'
      	option 'proto' 'static'
      config 'interface'
      	option 'ifname' 'eth0.2'
      	option 'proto' 'static'
      config 'interface'
      	option 'ifname' 'eth0.3'
      	option 'proto' 'static'
      config 'interface'
      	option 'ifname' 'eth0.4'
      	option 'proto' 'static'
      config 'interface'
      	option 'ifname' 'eth0.5'
      	option 'proto' 'static'
      	option 'ipaddr' '192.168.1.2'
      	option 'netmask' '255.255.255.0'

      Press Ctrl+O, Enter than Ctrl+X to exit

    • You can do this with scp:
      Download this file with your browser: network-tplink

       $ scp network-tplink root@192.168.1.2:/etc/config/network

      Enter the router’s password

  11. Reboot the router
    root@OpenWrt:/# reboot
  12. Connect your PC’s Ethernet adapter to TP-Link TL-WR1043ND router’s WAN port
    (this is the configuration port, and the out-of-band communication port for OpenFlow)

That’s all! From now you can install an OpenFlow controller (eg. POX). The default controller address is 192.168.1.10:6633 (which can be set in /etc/config/openflow file).

If you want to restore the factory firmware:
Restoring factory firmware on TP-Link TL-WR1043ND

Jump to previous: Converting Asus WL-500g Deluxe and TP-Link TL-WR1043ND to OpenFlow switches (Part 2)

Converting Asus WL-500g Deluxe and TP-Link TL-WR1043ND to OpenFlow switches (Part 1)

In this guide I will install OpenWrt Backfire on these routers with OpenFlow package.

WARNING: you may brick your router if version is > 1.7!
See Version/Model table

Device: TP-Link TL-WR1043ND Ver: 1.6
FCC ID: TE7WR1043NX
CPU: Atheros AR9132
RAM: 32 MB
Flash: 8 MB
Network: 4 + 1 ports (10/100/1000 Mb/s)
IP address before: 192.168.1.1
IP address after: 192.168.1.2
Software before: TL-WR1043ND_v1_130428
Version: 3.13.13 Build 130428 Rel.58290n

Software after: OpenWrt Backfire
Version: 10.03.1 (r33081)

OpenFlow
Stanford reference implementation
Version: 1.0
Device: Asus WL-500g Deluxe
FCC ID: MSQWL500GD
CPU: Broadcom 5365
RAM: 32 MB
Flash: 4 MB
Network: 4 + 1 ports (10/100 Mb/s)
IP address: 192.168.1.1
Software before: WL-500gD English Firmware
Version: 1.9.6.0
Software after: OpenWrt Backfire
Version: 10.03.1 (r33081)
OpenFlow

Stanford reference implementation
Version: 1.0

Build system:
Fedora 19 (64 bit)

If you are not using Fedora 19, you should virtualize it:
Installing Fedora 19 (64 bit) in VirtualBox

Building OpenWrt with OpenFlow package

  1. Open a terminal (by clicking Activities, typing “terminal” and press Enter)
  2. Update Fedora
    $ sudo yum -y update

    Enter your password
    Press Enter

  3. Install the packages that necessary to build OpenWrt
     $ sudo yum -y install git subversion binutils bzip2 gcc gcc-c++ gawk gettext flex ncurses-devel zlib-devel make patch unzip perl-ExtUtils-MakeMaker glibc glibc-devel glibc-static quilt sed sdcc intltool sharutils bison wget

    Note: All packages are necessary but some of them may has been already installed. And I am not wrong, you need subversion package because scripts use it.
    Enter your password
    Press Enter

  4. Download OpenWrt Backfire source from the OpenWrt Git repository:
    $ git clone git://git.openwrt.org/10.03/openwrt.git
  5. Get in the downloaded directory
    $ cd openwrt
  6. Update and install feeds
    $ ./scripts/feeds update -a
    $ ./scripts/feeds install -a
  7. Get out from openwrt directory
    $ cd ..
  8. Download the Stanford reference implementation of OpenFlow 1.0
    $ git clone git://gitosis.stanford.edu/openflow-openwrt

    If it doesn’t work here is a copy of it one my site: openflow-openwrt.tar.gz
    In this case you must extract it: $ tar -zxvf openflow-openwrt.tar.gz

  9. Get in the downloaded directory
    $ cd openflow-openwrt
  10. Move to the Broadcom branch
    $ git checkout -b openflow-1.0/brcm origin/openflow-1.0/brcm
  11. Link OpenFlow extension and configuration files in the OpenWrt directory
    $ cd ~/openwrt/package
    $ ln -s ~/openflow-openwrt/openflow-1.0/
    $ cd ..
    $ ln -s ~/openflow-openwrt/openflow-1.0/files
  12. Configure the build
    $ make menuconfig

    Select “Target System (…) —>”
    Select “Broadcom BCM947xx/953xx”
    Select “Target Profile (…) —>”
    Select “No WiFi”
    Select “Network —>”
    Check “openflow” package (to built-in <*>)
    Check “tc” package (to built-in <*>)
    Exit
    Select “Kernel modules —>”
    Select “Network Support —>”
    Check “kmod-tun” package (to built-in <*>)
    Exit
    Exit
    Select “Utilites —>”
    Select “Editors —>”
    Check “nano” package (to built-in <*>)
    Exit
    Exit
    Exit
    A dialog asks you here “Do you wish to save your new OpenWrt configuration?”
    Select Yes and Press Enter

  13. Make the toolchain for the target
    $ make tools/install toolchain/install
  14. Configure the Linux kernel
    $ make kernel_menuconfig

    Select Networking Support
    Select Networking options
    Select QoS and/or fair queueing
    Check Hierarchical Token Bucket (HTB) (to built-in <*>)
    Exit
    Exit
    Exit
    Exit
    Select Yes and Press Enter

  15. Build the OpenWrt image
    $ make
  16. Get out from openwrt directory
    $ cd ..
  17. Copy the created general firmware to here
    $ cp openwrt/bin/brcm47xx/openwrt-brcm47xx-squashfs.trx .

    This will be the firmware for Asus WL-500g Deluxe.

  18. Enter to openwrt directory again
    $ cd openwrt
  19. Clean everything
    $ make clean tools/clean toolchain/clean

    Note: a toolchain/clean should be enough here (but I don’t want to meet OpenWrt bugs)

  20. Get out from openwrt directory
    $ cd ..
  21. Get in the openflow directory
    $ cd openflow-openwrt
  22. Move to the TP-Link branch
    $ git checkout -b openflow-1.0/tplink origin/openflow-1.0/tplink
  23. Get to the openwrt directory
    $ cd ~/openwrt
  24. Configure the build
    $ make menuconfig

    Select “Reset to defaults”
    Select “Target System (…) —>”
    Select “Atheros AR71xx/AR7240/AR913x”
    Select “Target Profile (…) —>”
    Select “TP-LINK TL-WR1043ND v1”
    Note: From Backfire version of OpenWrt the Wifi module is automatically built in this platform, so we must clear it later from selection. DO NOT select “Default Profile (no WiFi)” here!
    Select “Network —>”
    Check “openflow” package (to built-in <*>)
    Check “tc” package (to built-in <*>)
    Uncheck “wpad-mini” package
    Exit
    Select “Kernel modules —>”
    Select “Network Support —>”
    Check “kmod-tun” package (to built-in <*>)
    Exit
    Select “Wireless Drivers”
    Uncheck “kmod-ath9k”
    Exit
    Exit
    Select “Utilites —>”
    Select “Editors —>”
    Check “nano” package (to built-in <*>)
    Exit
    Exit
    Exit
    A dialog asks you here “Do you wish to save your new OpenWrt configuration?”
    Select Yes and Press Enter

  25. Make the toolchain for the target
    $ make tools/install toolchain/install

    Note: If you have not cleaned tools than tools/install is not necessary.

  26. Configure the Linux kernel
    $ make kernel_menuconfig

    Select Networking Support
    Select Networking options
    Select QoS and/or fair queueing
    Check Hierarchical Token Bucket (HTB) (to built-in <*>)
    Exit
    Exit
    Exit
    Exit
    Select Yes and Press Enter

  27. Build the OpenWrt image
    $ make
  28. Get out from openwrt directory
    $ cd ..
  29. Copy the created general firmware to here
    $ cp openwrt/bin/ar71xx/openwrt-ar71xx-tl-wr1043nd-v1-squashfs-factory.bin .

    This will be the firmware for TP-Link TL-WR1043ND.

  30. You can safely remove the created directories:
    $ rm -rf ~/openwrt ~/openflow-openwrt

Congratulation! You have built the OpenFlow capable OpenWrt firmwares for these devices.

Jump to: Converting Asus WL-500g Deluxe and TP-Link TL-WR1043ND to OpenFlow switches (Part 2)

Restoring factory firmware on TP-Link TL-WR1043ND

If you have installed OpenWrt Backfire on your TP-Link TL-WR1043ND and want to restore the factory firmware than this guide is for you.

Device: TP-Link TL-WR1043ND Ver: 1.6
FCC ID: TE7WR1043NX
CPU: Atheros AR9132
RAM: 32 MB
Flash: 8 MB
Network: 4 + 1 ports (10/100/1000 Mb/s)
IP address: 192.168.1.2

Software on router before

OpenWrt Backfire
Version: 10.03.1 (r33081)

Software on router after

TL-WR1043ND_v1_130428
Version: 3.13.13 Build 130428 Rel.58290n

Host operation system is Fedora 19 (64 bit).
If you are not using Fedora 19, you should virtualize it:
Installing Fedora 19 (64 bit) in VirtualBox

I presume that you can communicate with your router.

Preparations

  1. Go to TP-Link Support site: http://www.tp-link.com/en/support/download/
    Click “TL- WR1043ND” (it’s in the 300Mbps Wireless N group)
    tplink_support
  2. Read the warning message and click “If you have read the above notice, please click here to find hardware version.
  3. My router is V1 because “Model: TL-WR1043ND Ver: 1.6” written on its back
    Click “TL-WR1043ND V1
    version_select
  4. Download the firmware by clicking “TL-WR1043ND_v1_130428
    Warning: Do NOT download an other firmware version because in case of TP-Link there may be different steps to take.
    If it doesn’t work here is a copy of it one my site: TL-WR1043ND_v1_130428.zip
    correct_firmware
  5. Decompress the firmware
     $ unzip TL-WR1043ND_v1_130428.zip
  6. Check firmware checksum
     $ sha1sum wr1043nv1_en_3_13_13_up_boot\(130428\).bin

    It should return:
    25c3c2bd86dba8bd4c68489489e28e580560bf6c wr1043nv1_en_3_13_13_up_boot(130428).bin

  7. This firmware version also contains the boot code so we have to strip it first
     $ dd if=wr1043nv1_en_3_13_13_up_boot\(130428\).bin of=wr1043nd_v1_correct.bin skip=257 bs=512
  8. Check the corrected firmware checksum
     $ sha1sum wr1043nd_v1_correct.bin

    It should return:
    6899d121113c92d93a20ae7b308bc06a3295aba0  wr1043nd_v1_correct.bin

Firmware update

  1. Copy this file in the router
     $ scp wr1043nd_v1_correct.bin root@192.168.1.2:/tmp/

    Note: My router IP address is 192.168.1.2, change it to your router IP address in all commands

  2. Login to your router
     $ ssh root@192.168.1.2

    Enter your password.

  3. Write the firmware to flash
    root@OpenWrt:~# mtd -r write /tmp/wr1043nd_v1_correct.bin firmware

    mtd

  4. Wait until “Rebooting …” appears
    Note: If you have configured your router as an OpenFlow switch before using my guide than you have to pull out the LAN cable from WAN port now and plug into a LAN port (eg. LAN1).
  5. Go to http://192.168.1.1 in your browser
    user: admin
    password: admin

    Press Enter

    login_page

Congratulation! You have just restored the original firmware.